By Barry O'Regan- Bohning Pro Field Staff
Summary
How many of us take it for granted our new sight is turnkey and ready to shoot out of the box? I know I did!
Most likely 90% of archers, whether shooting target, 3D or hunting take it as gospel.
Gospel soon runs out of prayer when many who are shooting various distances, including uphill and downhill find they miss the 3D X spot or the FITA target or Game animal entirely. Some blame it on the their shooting stance, broadheads, vanes, arrows or the bow, the excuses can be endless. Perhaps one reason may be that out of the box bow sight could be the culprit.
A missed shot when hunting game, lost scores in field shooting and 3D shoots may be attributed to your sights' axis. Hunters using Broadheads or shooting uphill or downhill in rough terrain will certainly understand why a getting your Axis sight planes bang on is important.
Hamskea have developed a 3rd Axis tool to cure your 1st ,2nd and 3rd "Axis of Evil" issues where other axis sight tuning developers left off. Hamskea even supply a How to DVD for a minimal charge.
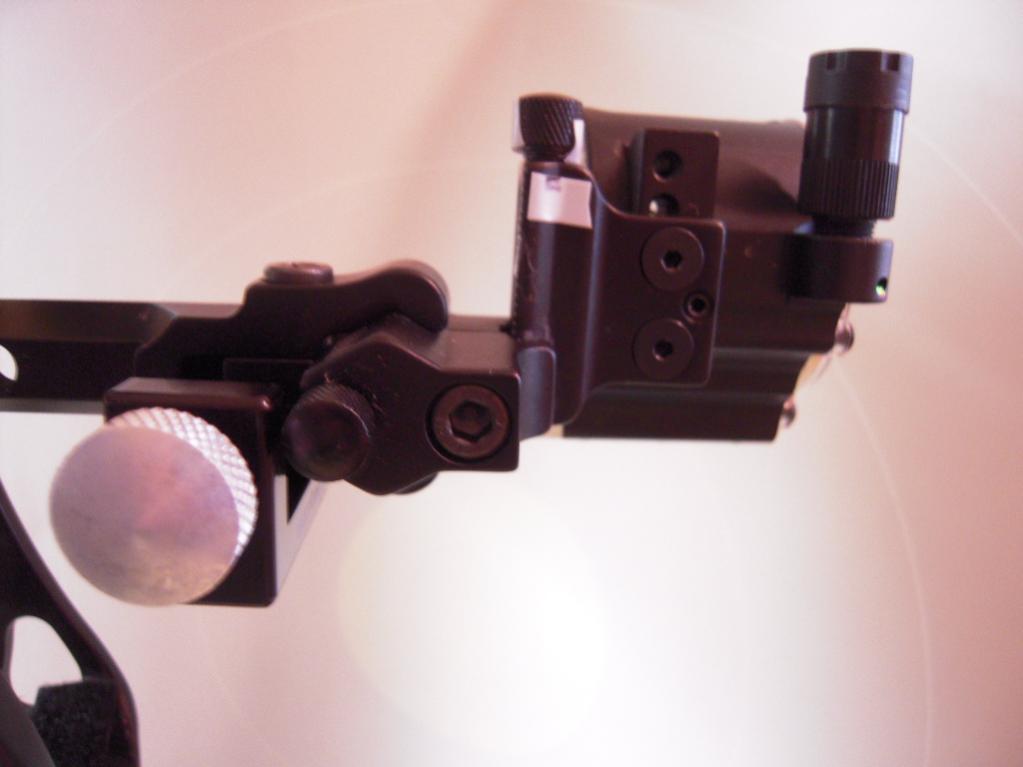
The HAMSKEA Archery Solutions Easy Third Axis Level™
The Hamskea easy 3rd Axis level will enable even the novice archer to adjust their target and hunting sight for 1st, 2nd and 3rd axis. This is vital in order to achieve the maximum accuracy for any shot angle and distance. Without your axis adjusted correctly, your impact point will vary depending on the severity of the shot angle and distance.
The Easy Third Axis Level™ is easy to use as it mounts to your sight's vertical sight bar (for target sights) or to the riser's sight window (for hunting sights) with the non-marring nylon tipped thumb screw. It has a hard anodized finish and comes with a carrying drawstring pouch.
The great thing about the Hamskea Axis level is it fits in the palm of your hand and can slip easily in your pocket for a quick re-check of your sights axis plane and alignment in the field if your sight gets bumped or jostled around when wearing sling bow quivers or another archer bumps your sight when placing their bow next to yours in the club bow rack.
Best you use a pro pod device and keep your bow away from the rest of the archery pack.
Best you use a pro pod device and keep your bow away from the rest of the archery pack.
Other Axis tuning sight products
Sure Loc also have a 3rd Axis tool as well, but it looks like it is designed solely to clamp on Sure Loc Sight Machine Heads.
The Hamskea 3rd Axis tool seems to be more universal for all types and makes of sights, hence why I chose the Hamskea. The Hamskea 3rd Axis tool can clamp almost anywhere, from sights to risers if need be.
What I did not realise there is a 4th Axis, it is the sight mount which affixes to your riser, with some risers painted of bizarro designs like my Pro Elite, a cure to ensure your 4th Axis is level is accomplished with a piece of aluminum or other metal to act as a shim between the riser and sight mount.
Other Axis tuning sight products require you to bolt their Axis tuners to the tabletop. These tabletop Axis Tuning models are a fixed static (stationary) design, and to tune your sight it must be performed on a tabletop. Somehow leveling your sights for the correct axis and accuracy on a tabletop does not make great hunting kit, unless you're hunting for chairs!
Why you need to cure your Axis of Evil for Accuracy
A hunting or target sight needs to be affixed to your bow if you are to have any chance at getting an accurate determination of all three axis planes.
I will show how to set up both your Target sight and fixed pin Hunting sight, including how to photos.
Once the sight three axis planes are level, the next step is to raise and lower your bow and compare the alignment of the bows sight bubble with the Hamskea sight bubble. Both bubble positions should be identical and centred.
The next step is to install the threaded Hamskea alignment tool into the Hamskea 3rd Axis tool.
Once done, you will then place your bow under dynamic force (with your Hamskea 3rd axis sight and alignment tool still attached) by drawing back your bow, then looking down the Hamskea alignment sight pin where you can verify the sight alignment by first aiming at a fixed vertical line and then raise and lower bow along the same vertical fixed point. This will ensure the sights up and down sight alignment at full draw is centred and accurate.
If the Hamskea alignment tool on your sight does not vary, your sight alignment and axis plane are bang on accurate for any distance shots as well as those uphill and downhill shots.
The attached photos and instructions I provide will show you how to cure your three axis of evil.
Tools you'll need
To begin you will need a bow vice.
Axis leveling tools you will need:
b) 36 inch Straight Edge Carpenter level (Available at any hardware store)
c) A small 45 degree Carpenter steel square (Available at any hardware store)
Optional Tools to use
Optional Tools to use
R.S. Archery Products Tuning Levels. (Optional, but great for verifying the bows 1st and 2nd axis too!)
Double Take Archery Laser BowPlane2 This laser is basically an arrow with a laser built into the shaft to align all your contact points such as cams, string, peep, arrow rest and sights.
While you do not need a laser to achieve your 3rd Axis at all, it is a nice to have.
As the attached photos will attest a laser will certainly make like a lot easier if you can beg, borrow or buy one of these tech marvels before setting up your bow before hand.
Beer or Soda Can and Snacks (it's nice to have a tasty refreshing beverage on hand).


Let's get started
Your sight needs to have a fixed bubble level attached, and if your sight adjustment head is a newer model it is sure to have a 2nd and 3rd Axis adjustment.
If your Hunting sight does not have a fixed bubble level, no fear, you can McGuyver one using one of the R.S. Archery Products clip on bubble level onto the bottom or top of your sight temporarily. (Not perfect, but it should get you in the ball park).
First get your Bow level
Put your sight on your bow and place your bow into the bow vice, level the bow in an upright dead level vertical position and dead level on the horizontal plane. This is imperative for all bows (Refer to photos below).


Attaching the Hamskea 3rd Axis level
Once the bow is level attach the Hamskea 3rd Axis level onto the vertical sight bar on your Target sight head. If not possible attach it to the flat spot on your dovetail arm. For bolt on hunting sights place your Hamskea 3rd Axis level onto a vertical flat spot on your bow riser. Some hunting bow riser configurations are rounded or curved so try and find a flat vertical spot.
(Refer to the Photos with the Hamskea 3rd Axis below)


1st Axis
Now set your 1st Axis on your sights dovetail bar.
(*Bolt on sights without a sight bar you will need to keep the Hamskea on a flat vertical spot on your riser, see photos above in previous thread).
You will notice the Hamskea 3rd Axis bubble level attached to the Sight dovetail bar is level on the Horizontal Plane on the dovetail bar.
As an option (As I have done) you can also attach an R.S. Archery Level vertically to the sight (bar) to ensure the sight (bar) is level on all counts to compare to the bows vertical and horizontal plane is level. (Refer to Photos).
Now compare the Hamskea 3rd Axis bubble level (Horizontal Plane) at the 1st Axis (foreground) with the sight level (shown in the background)! Certainly an eye opener as the sight level bubble is far left to Hamskea's bubble level at dead centre.
If the sight bar is not level in or out, try readjusting your sight bracket, if it is to no avail, check your mounting bracket and shim it with metal between the mounting block and the riser. You can use feeler gauge metal or cut a piece of aluminum from your Beer can, as you should now be on your second beer!


2nd Axis and 3rd Axis Sight Adjustment
Unlike the 1st Axis in which you need to have your bow upright in a front to back or forward to rear motion to get your bow level.........
Your 2nd Axis plane on your bow works as a side to side motion, such as a your bow if tilted incorrectly you would (standing and facing the bow straight on when it is in the bow vice) end up with a bow with a "top bow left limb position and a bottom bow limb right position" or top right to bottom left" adjustment tilt. The bow should be perfectly positioned up and down.
Adjust your bows side to side (left to right) tilt or plane ensuring your bow is straight up dead level on the 2nd axis, before proceeding to correct your sights up and down 2nd axis plane.
Hence why it is important to have your bow once in the vice to be perfectly aligned with Axis 1 level (forward-backwards position dead level), as well as your 2nd Axis (left to right) dead level plane.
We will now proceed with the 2nd Axis adjustment for the sight level. Affix the Hamskea 3rd Axis bubble level to the sight block or if this cannot be done affix the Hamskea 3rd Axis bubble level to the dovetail sight bar.
* (Bolt on Hunting sights keep the Hamskea 3rd Axis bubble level affixed to the riser)
You will note I use both the Hamskea Axis level as well as the R.S. Archery Products clip on level to ensure accuracy on all axis planes.
* If you have a modern sight, it should have marking indicators on the side or bottom of the sight stating 2nd and 3rd Axis with an adjustment screw e.g. Axcel sights. If not adjust the screw which affects your sight body vertical up and down adjustment, refer to photos attached. Make the adjustment until your sight bubble on the Hamskea is level. Lock down the 2 Axis screw and proceed to the next step adjusting your 3rd Axis.
3rd Axis Sight Adjustment
I use a metal Carpenters 45 degree square (Not Shown in Photo, Camera exposure was off) to set my 3rd Axis by placing the Carpenters square against a flat spot on the sight machine head and compare the squares metal edge when placed against the sight. I have a drawing instead attached. Sorry.
If it is not flush with the metal edge I adjust the screws for the 3rd Axis plane until the sight body is flush with the Carpenter squares metal edge.
Think of the 3rd Axis plane on your sight body like a door in your home, it swings in and out horizontally displaying a swinging motion.
We will now proceed with the 3rd Axis adjustment for the sight level. With the Hamskea 3rd Axis bubble level on the sight block or if this cannot be done affix the Hamskea 3rd Axis bubble level to the dovetail sight bar. * (Bolt on Hunting sights keep the Hamskea 3rd Axis bubble level affixed to the riser) You will note I in this tutorial that I use both the Hamskea Axis level as well as the R.S. Archery Products clip on level to ensure accuracy on all axis planes.
Using the metal Carpenters 45 degree square you can now set your 3rd Axis by placing the Carpenters square against a flat spot on the sight machine head and compare the squares metal edge when placed against the sight. If it is not flush with the metal edge I adjust the screws for the 3rd plane until the sight is flush with the Carpenter squares metal edge.
Once you have your 3rd Axis squared with the Carpenters metal 45 degree square, verify the sight bubble level position by reaffixing your Hamskea 3rd Axis bubble level position on your sights machine head or dovetail. (For bolt on hunting sights bolted to the riser, verification is the same) Both bubble the sight and Hamskea bubble levels should be aligned perfectly with the Bow set in the vertical position.
Now with both bubbles aligned perfectly, loosen your bow vice vertical adjustment just enough so you can now move your bow up and down in the bow vice. Your bubble level on your sight and the bubble level on your Hamskea 3rd Axis tool should remain in the identical vertical bubble position.


Now the Trial and Error adjustments
Now with both bubbles aligned perfectly, loosen your bow vice vertical adjustment just enough so you can now move your bow up and down in the bow vice.
Your bubble level on your sight and the bubble level on your Hamskea 3rd Axis tool should remain in the identical vertical bubble position.
Bubble levels not identical ?
If the Hamskea 3rd Axis bubble is out of centre when raising the bow up or down, check your Bows horizontal level (side to side) as it may have shifted in the bow vice.
If the sight level bubble is also out of centre left or right when raising the bow up or down, check your Bows horizontal level (side to side) as it may have shifted in the bow vice.
If the Hamskea 3rd Axis bubble is centred perfectly when raising the bow up or down, but your sight bubble has shifted left or right, you will have to adjust your sights 3rd Axis and repeat the 3rd Axis Sight Adjustment steps again until both the sight bubble level and the Hamskea bubble level are aligned perfectly. See the photos in the preceding thread. If not go, level the bow again and determine if the 2nd and 3rd axis needs re-adjustment.
Another reason of the Axis is not aligned is you already finished off a six pack of beer on an empty stomach at the "Let's get started phase of this tutorial" didn't you?
Well you may as well go lie down on the couch for a few hours and repeat the process all over again.
If you have all three Axis aligned, proceed to next phase of this tuning project.


Once you have cured your "Axis of Evil" proceed to your bows "Sight Alignment"
Take a roll of masking tape and a 36 inch Straight Edge Carpenter level.
Place a 5 foot strip of masking tape and place it vertically on a flat wall or door while aligning it perfectly with your 36 inch Carpenter straight edge level.
Remove the Hamskea 3rd Axis bubble level off your bow and insert the threaded Hamskea alignment pin halfway into the Hamskea 3rd Axis bubble level threaded hole.
Reinstall the Hamskea 3rd Axis bubble level back on your bow(either on your riser or dovetail arm, ensuring the threaded rod is aligned vertically (up and down) and is visible to use as a vertical sight pin.
Then stand back 5 or 10 feet from the 5 foot perfectly aligned vertical tape strip you placed on the door or wall and draw back your bow as you normally would (Arrow optional, if you are going to use an arrow indoors, tell everyone to leave the room(s)).
With the bow drawn back align the Hamskea alignment pin along the edge of the vertical masking tape outer edge (Don't bother looking at the bubble levels on the Hamskea or the bow sight).
If you have followed this tutorial perfectly, your alignment pin should be perfectly aligned with the outer edge of the masking tape. The at full draw, move the bow up and down noting if the alignment pin is tracking perfectly along the outer edge of the masking tape.
If all is aligned perfectly, you're good to go. You can now proceed to puff up your chest, high five everyone within shouting distance and yell to your significant other that "YOU WANT STEAK FOR DINNER"!
Now get out to range and fire out a few dozen arrows and witness better accuracy than ever before.
The Hamskea sight runs about $54.95 U.S. and the instructional DVD $11.95 U.S.
The R.S. Archery Product Levels (Quantity 2) run about $15.00 U.S.
The Double Take Archery Laser BowPlane2 $99.00 U.S.
Needless to say these three above mentioned products should be a must have in an Archer's Kit.


No comments:
Post a Comment